When you have reviewed the comparison results, you can run the Synchronization Wizard to create the SQL script to synchronize selected rows:
- Select the rows that you want to synchronize.
- Click
 Synchronization Wizard to start the Synchronization Wizard.
Selecting the rows to synchronize
By default, when you run the comparison on a project, all rows that differ are selected for synchronization. You can modify the selection by using the appropriate check boxes in the comparison results.

You use the check boxes to select rows for synchronization as follows:
- All Different for all rows that are different for a table or view
 for all rows in a table or view that exist in the database on the left but do not exist in the database on the right
 for all rows in a table or view that exist in both databases but the rows are different
 for all rows in a table or view that exist in the database on the right but do not exist in the database on the left
You can also use the options in the Actions ![]() drop-down menu to help you with your selection:
drop-down menu to help you with your selection:
- Include All and Exclude All select and clear all the check boxes respectively.
These options are also available in the main Actions menu.
- Include All on the Left and Exclude All on the Left select and clear the check boxes in the column.
- Include All Different and Exclude All Different select and clear the check boxes in the column.
- Include All on the Right or Exclude All on the Right select and clear the check boxes in the column.
Note that the Actions ![]() drop-down menu is not available if you are viewing the comparison results in a single list.
drop-down menu is not available if you are viewing the comparison results in a single list.
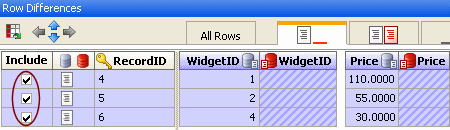
You can then use the Row Differences pane to select individual rows to synchronize:
- Click the table or view to display the Row Differences pane.
- In the Row Differences pane, click the appropriate tab to view the row differences.
- Select or clear the check boxes in the Include column as required.
Selecting the rows to synchronize using keyboard shortcuts
To select a row for synchronization, highlight the row and press SPACEBAR to select or clear its check box.
To highlight multiple rows:
- For the previous or next row, press SHIFT+UP or SHIFT+DOWN
- For all rows from the current row to the first or last row, press CTRL+SHIFT+HOME or CTRL+SHIFT+END
- For all rows, press CTRL+A
You can also use SHIFT+Click and CTRL+Click to highlight multiple rows.
To switch focus between the list of tables and views, and the Row Differences pane, press F6 or CTRL+TAB
| See Also |
Viewing the Comparison Results | Viewing the Row Differences | Using the Synchronization Wizard
© Red Gate Software Ltd 2008. All Rights Reserved.